How to Paint Leather Furniture
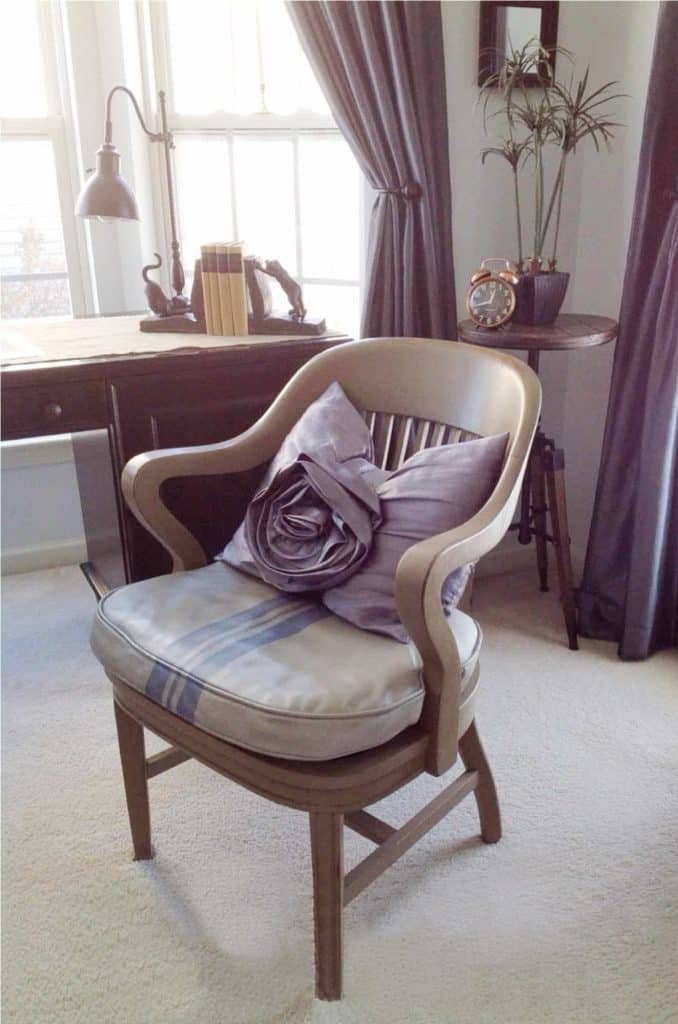
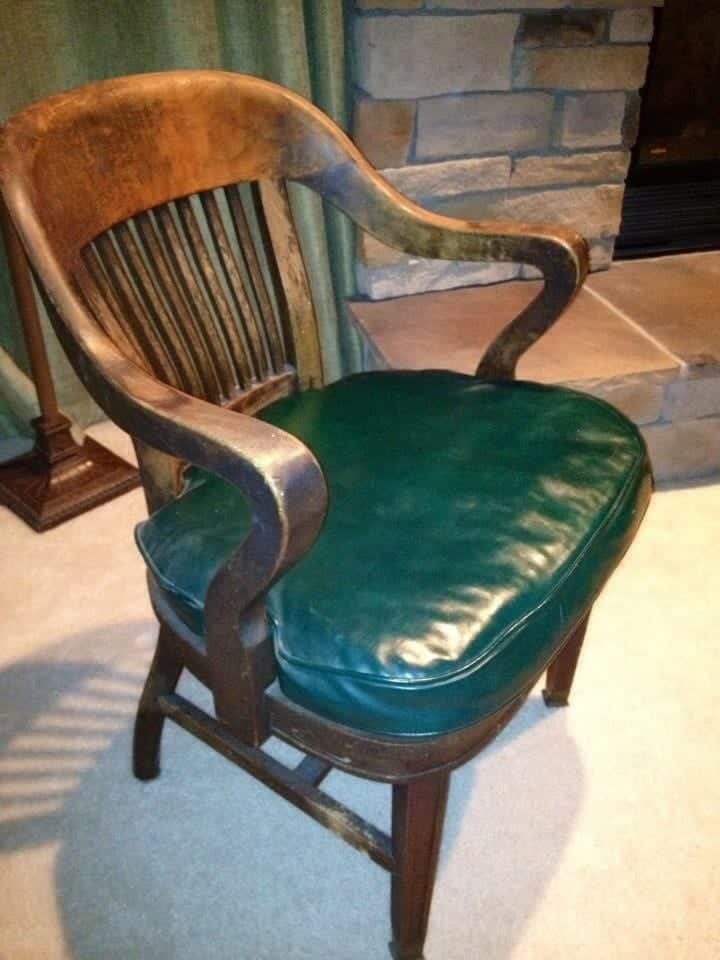
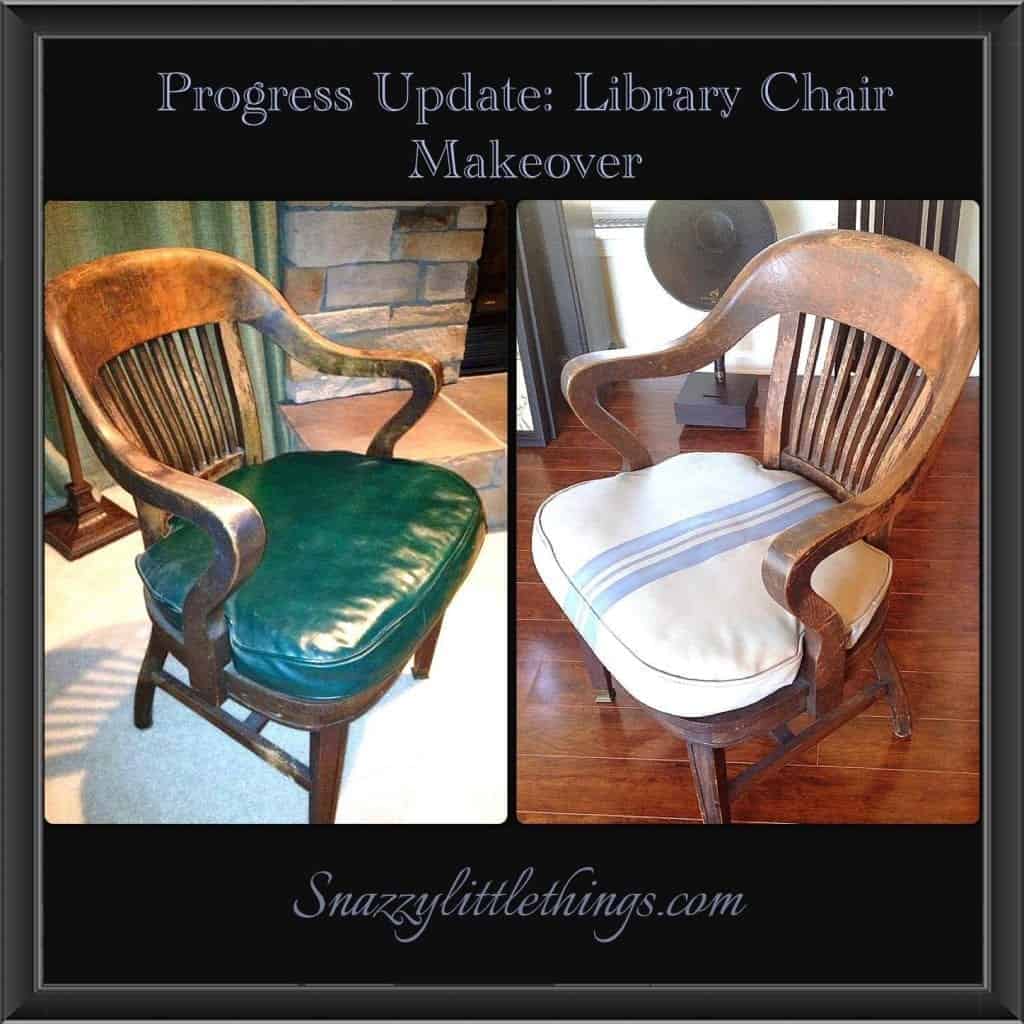
This library chair was a bit of a misfit. The poor thing just couldn’t fit in with the rest of my house. The wood was in need of refinishing, and the leather was hunter green. I love the shape of the chair (good bones, right?) but it just wasn’t mixing well with the other colors in my house.
So, I decided to take the plunge and paint the leather.
Now think for a second about natural leather and it’s color. Is leather ever a SOLID color? No, not exactly…
So here are some tips about about maintaining a natural looking leather with chalk paint:
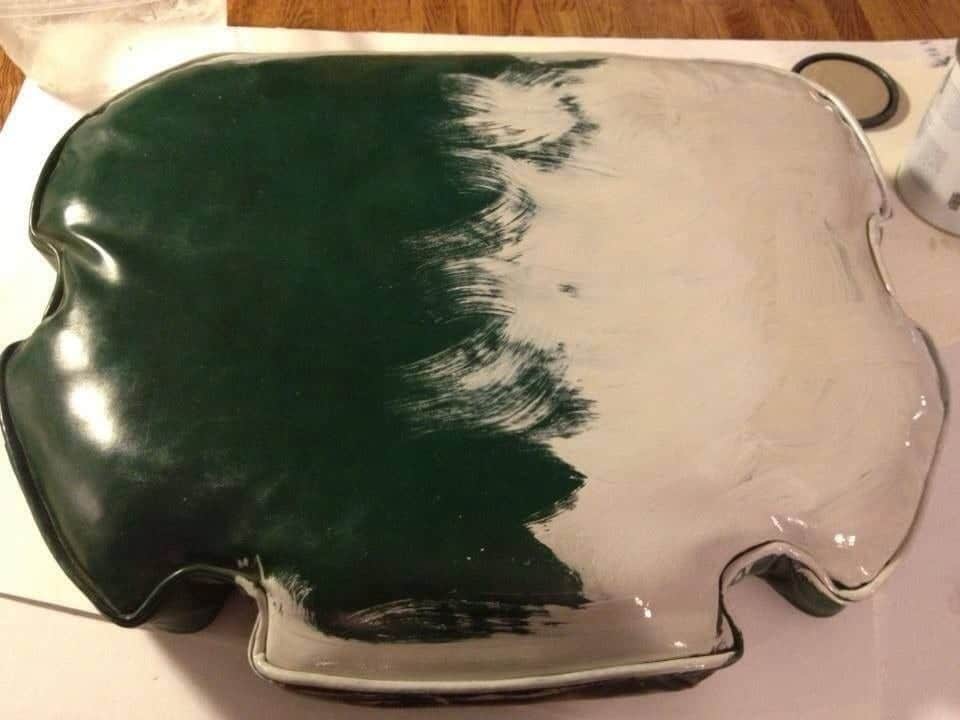
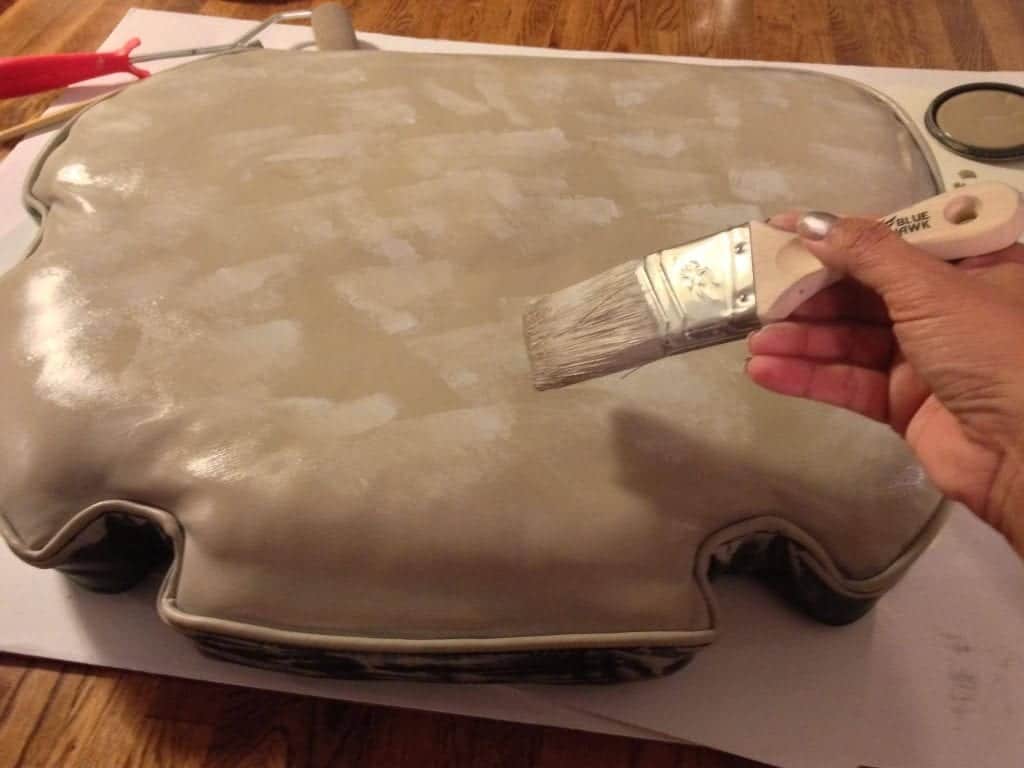
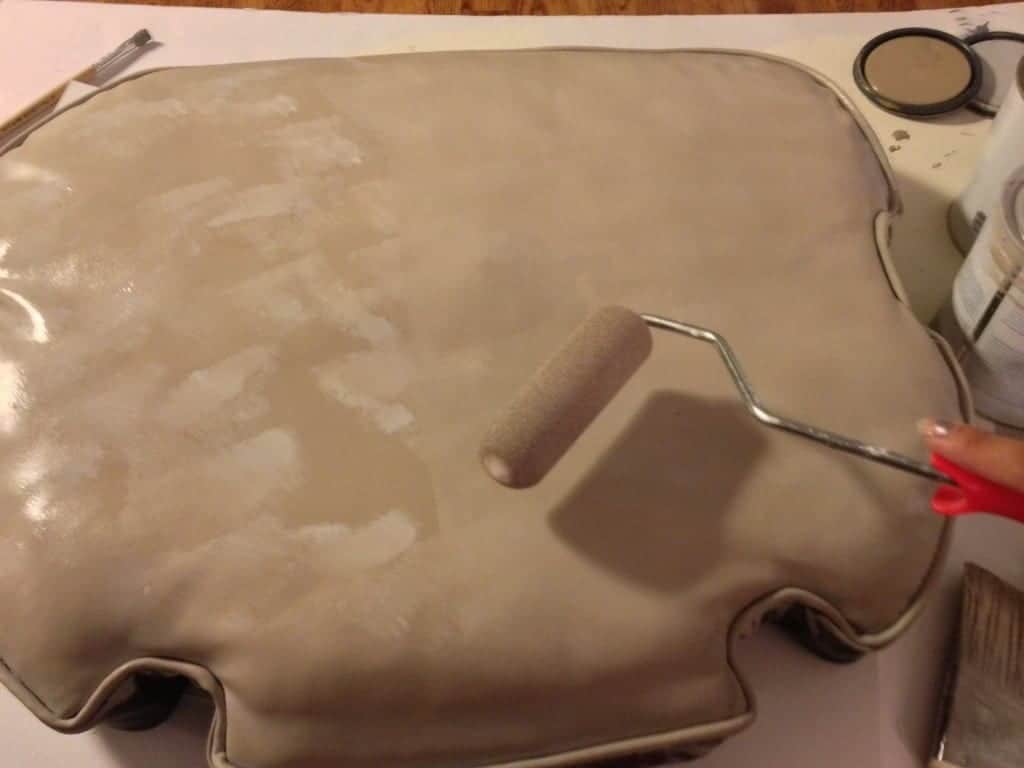
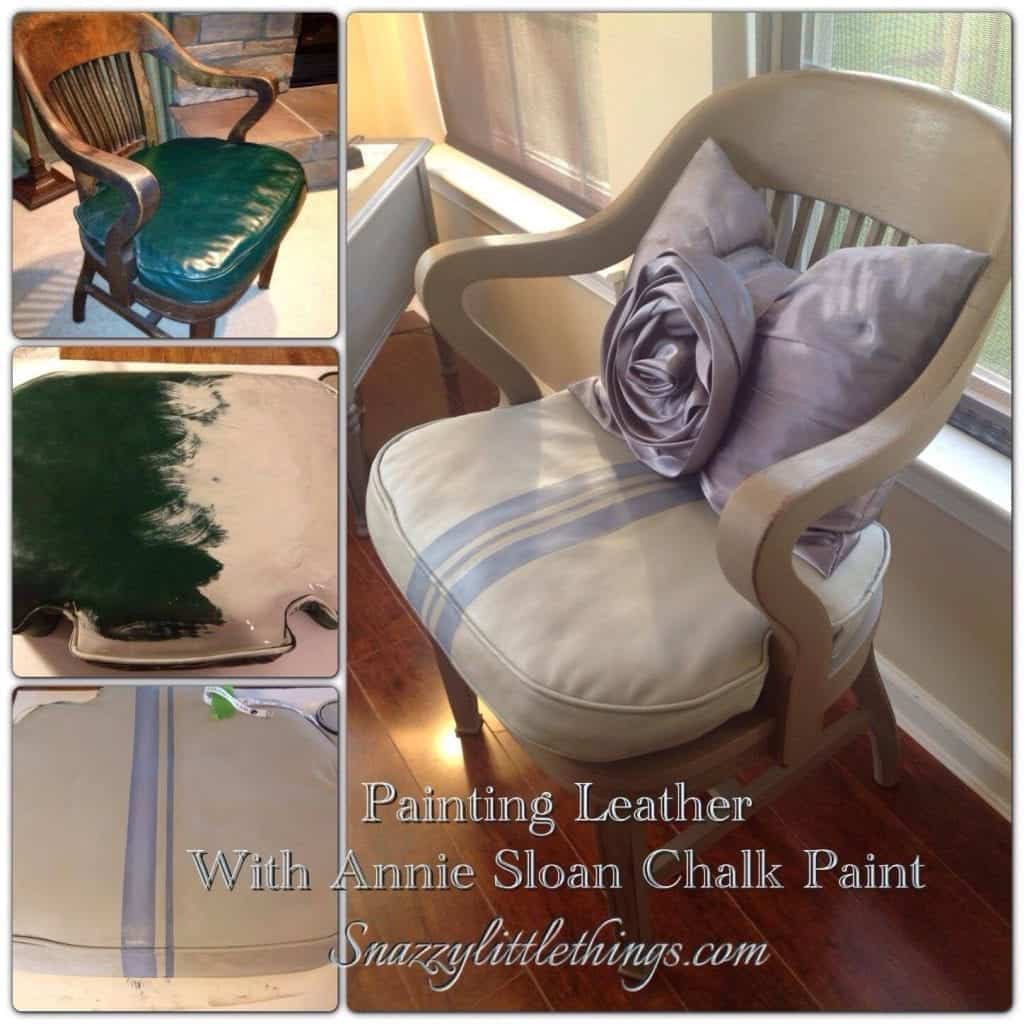
1). Use two colors! Using two colors achieves a more natural effect. Make sure they are two colors that blend well. In my case I applied one as a base coat, then layered on the second color of paint in a cross-hatch pattern. If more color variation was needed I would repeat by adding the two colors again in a cross-hatch pattern. (Meaning, apply paint in an “X” pattern).
2) Keep a wet edge. This means you should have water and spray your piece, or dip your brush to to thin the paint and eliminate brush strokes (Tip: remember using water color paint kits as a kid? Treat the paint like that).
2). Apply many, thin layers. Apply thin, but many layers. (don’t try to achieve 100% coverage on the first coat). I used a cross-hatch pattern throughout the entire process (see below).
4). Use a foam roller. Use a clean foam roller before your cross-hatch application (above) dries for additional blending.
To share some thoughts on the process
After each coat I would decide if it looked natural. If not, I’d add some variation of color by layering or “dotting” additional paint onto the chair, and work it in the cross-hatch pattern again. (Basically repeating all the steps above several times). I always had water on hand and use the dry foam roller to eliminate brush strokes. I used water to keep a wet edge to help with blending.
One you like the look and feel the leather looks natural, WALK AWAY and let it dry.
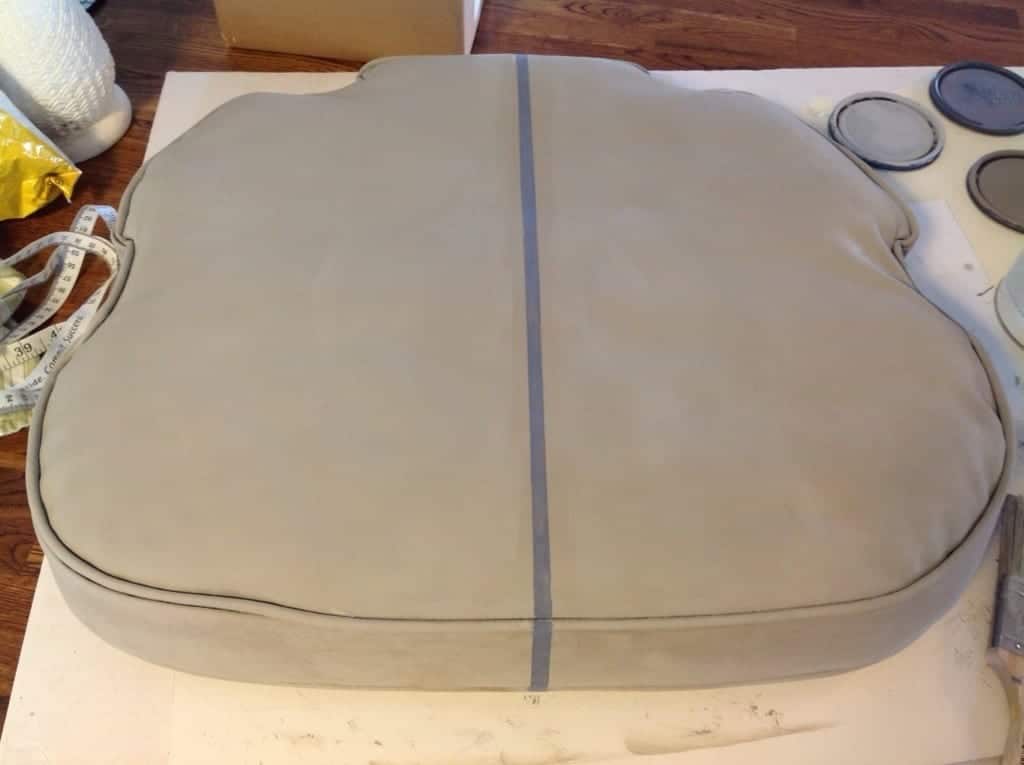
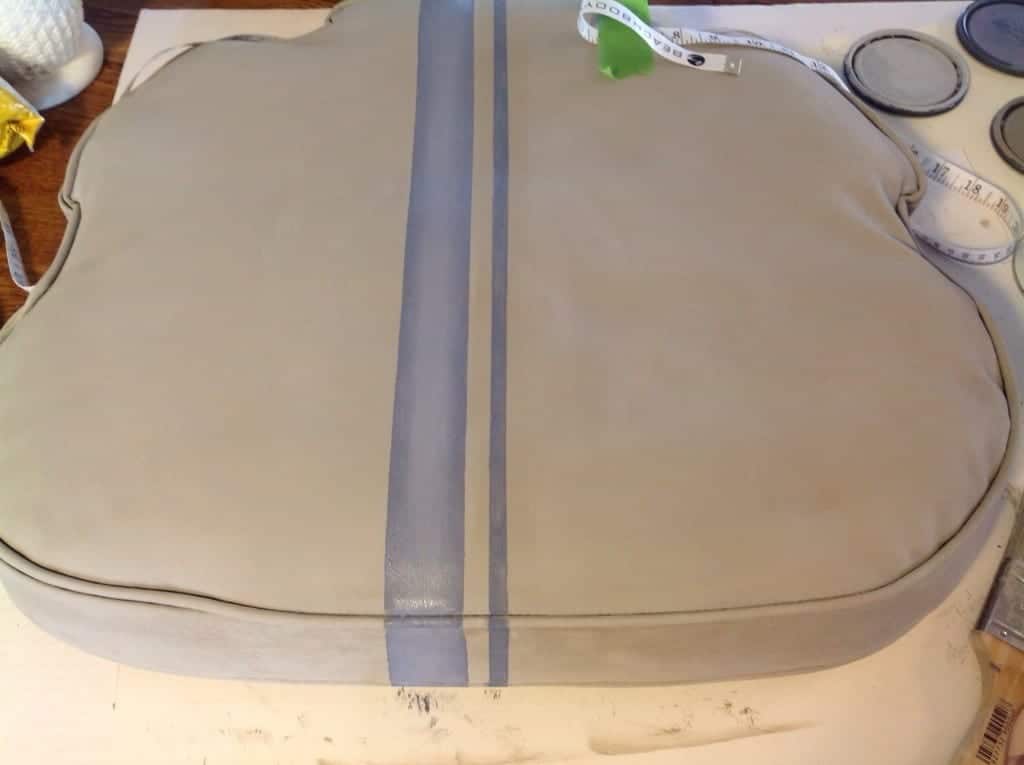
After the cushion dried, I decided to add a ticking stripe down the center. I used a third color, for this–Annie Sloan Chalk Paint Old Violet. (I had not yet waxed the cushion, that was the last step).
Below is the progress update. I had not yet touched the wood…and was deciding what to do…
Then I turned to my faithful friends on my Facebook page, and they all unanimously said “paint the wood!!” So I did. (In Annie Sloan Chalk Paint “Cocoa”).
Step 5: Apply Wax. Which reminds me to tell you….I used clear wax on the leather, and a combination of clear + dark wax on the wood.
So now this misfit has become pretty popular and was retweeted by the This Old House team, and even James Young II from DIY Network’s “I Hate My Kitchen”. That was a pretty exciting 15 seconds of fame there on Twitter.
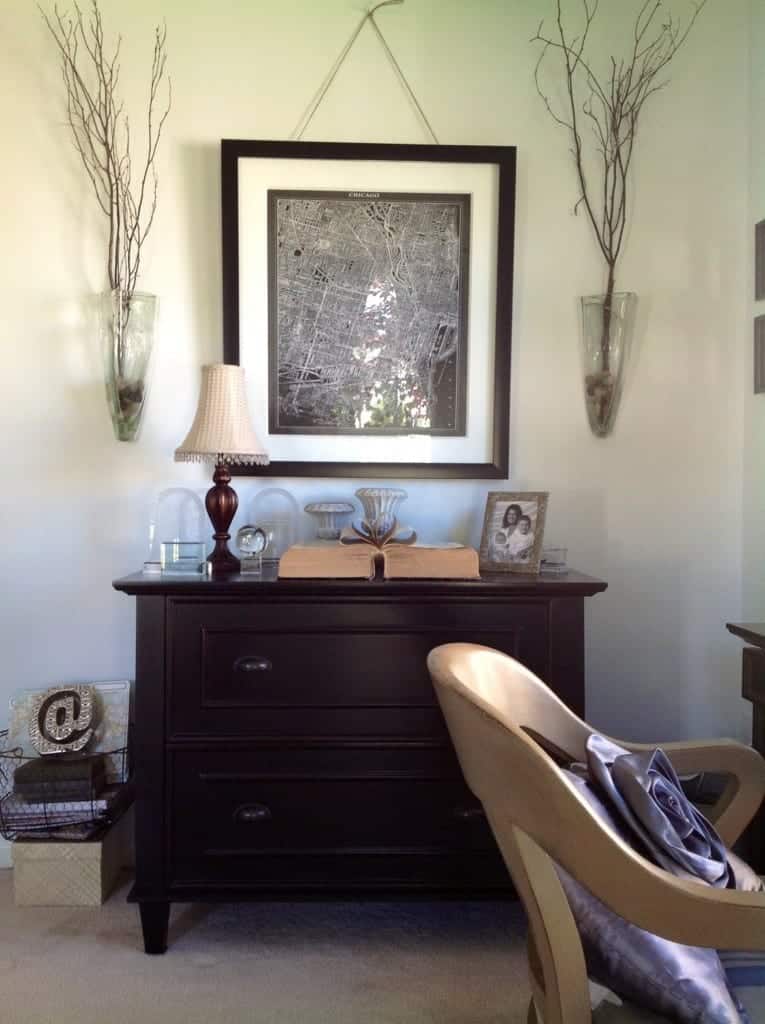
…you’ll even start seeing it photobomb most every room picture in my house. :)





That is amazing! I am planning on painting a fabric chair this week :) your chair came out fantastic and is totally inspirational!!
Thanks Dria…this is one of a pair…I have yet to finish the other one. I do like how they turned out…the hunter green wasn’t working.
Dria keep me posted…I tried painting fabric this summer and I am a skeptic only because I thought an outdoor pillow was a good place to start and it was pretty crusty. So my fingers are crossed and I value your recommendation…painting is so much easier than reupholstery. (trust me!)
You did a great job!!! Looks fantastic!
Ruth, thanks for the kind words. What a difference, huh? I couldn’t take the hunter green anymore…thank you for stopping by!
What an amazing transformation! Looks fabulous! Thanks so much for sharing at my Twirl & Take a Bow Party!
This looks amazing! Are you going to do a tutorial on the ticking stripe too? Please, please, please? For me, that’s what makes the chair! :)
Haha…I will. I was kind of winging it on the ticking stripe, sort of like when I hang a picture…I eye up the center and start hammering. For the stripes, I used Frog Tape and taped it off, and brushed on the Old Violet. I appreciate your comments, I like the stripe a LOT, it does make the chair. When I finally finish chair #2 I will take pictures, my first project pics were lost in an iPad reset.
What colors of paint did you use for the chair cushion? Beautiful!!!!
Thank you Gloria. The chair (base color) was Annie Sloan Chalk Paint: French Grey blended with Cocoa. Then the stripe was Old Violet. Thanks for visiting my blog!
I love this, Jeanette! And, the color with that adorable pillow is way too sweet! Thanks for sharing at Throwback Thursday. I will be featuring this tonight!
xoxo
Denyse
Denyse, thanks SO much for the feature. How do you keep up with all that you have going on. Thanks again! …xoxo
Jeanette,
I love that you gave this chair, both leather cushion and wood, a new stylish life using paint. I’ve been shopping for new upholstered dining chairs to replace 4 leather parson style chairs but the cost of new chairs is shocking. My leather chairs are in good condition but they just don’t work in our current dining room, primarily because of the color. So chalk paint, eh? What does the now painted and waxed leather feel like? Super slick? Stiff? Does it make a crinkling sound when you sit? How much paint did you need for the cushion … I’ve heard ASCP goes a long way. Thanks so much.
Robin, thanks so much for stopping by. Actually the piece (especially with the wax) gets SOFTER over time. It feels identical to how it felt before paint, quite honestly. No crinkling sound…and because ASCP is water based, it really does go a VERY long way. I will reply to your email too to answer any questions you might have. : )
Thank you so much for the great directions on painting leather to make it look great! I have 2 1970s footstools that have leather flat pillow tops and beautiful bases that will NOW be able to be completed! I have known I would paint them, but didn’t have the nerve to start. The cross-hatching is such a natural technique, I’m thinking……………why didn’t I think of that! Of course, YOU did, and that’s all that counts! You made my morning! THank you!!! Debbie
Debbie, thanks for your nice comments…I’m so glad! If I could do the project again, I would “perfect” it by choosing colors with more contrast (same color family but I think it would have made it look even more authentic). The water definitely helps eliminate brush strokes and will blend. Remember….many layers of paint. Don’t worry if one layer doesn’t dry perfectly…you can always “dot” more color on with the next layer. This is a pretty foolproof project…good luck! Stay in touch!
Excellent tutorial, to the point and funny!
Wow, what an amazing transformation. I’m always in awe of what can be done with a little paint and a great imagination. Love it! Thanks so much for sharing at Vintage Inspiration Best of 2014.
Wow! What a great transformation! I have a chair with leather in my living room that is in dire need of an update. This just might do the trick! Thanks for sharing! Pinning!
Beautiful transformation! I love furniture upcycling. It gives me such a feeling of accomplishment on so many levels :). The stripe is a wonderful personalized touch!
Thanks Candance, this is my office chair and I’m sitting in it right now. It feels good knowing it’s getting good use after all this time. Thanks for stopping by!
How nice for you and your family. You have the talent to make furniture look great.
Thank you for coming to the Inspire Me Monday Linky party.
Janice
HI…can you do this to leather furniture that is worn/dry/damaged in any way?? thanks ;)
If I’m faced with a damaged piece, my own advice would be to try paint first, with the knowledge that it might not work out and may need to be replaced anyway. I don’t often paint leather or fabric unless I think it will really look authentic. I hope this advice helps and good luck with your project!
I really like what you have done here but am wondering how hard wearing it would be. I’d love to do my entire three piece suits and turn it from dark brown to grey. Is it likely to be scratch proof, I have a dog.
Hi, I am wanting to paint my barstools… they have either vinyl or leather on the seats… how is your chair holding up? Do you have cracks or peeling going on? Do you think vinyl and leather react the same way with the chalk paint? Thanks for any help you can offer.
Hi Nancy, I will post an update on the chair. It behaves a lot like real leather, over time, it starts to look more natural. But also like real leather, it doesn’t sustain scratching very well (like my dog who put his claws up). I use this chair all day (work at home) so it sustains normal wear / tear perfectly. :) I hope that helps! Thanks for stopping by and commenting and good luck w/ your project.
Wow! What a transformation! I was wondering how / what product you used for the final waxing step – I want to paint a leather chair I have with a pattern but want to make sure to wax it so that the design seals.
Thanks!
Hello there! Thanks for the step by step tutorial to paint a furniture. I find out yours is the best so far :) I have been planning to paint my dark brown sofa for quite some times but still hesitating to do it. By the way, may I know how long do you take to dry the chair before put a wax? Thank you!
Hi! I know you posted this a year ago, but I was wondering if you remembered what kind of pint and wax you used? Looking into a very similar project!
This chair has great bones. I love the shape and the worn look of the seat. I love this piece and I want to go out and look for a chair like this.
Thanks Vanessa! I would try “library chair” in your searches, and I know you’ll make anything you find beautiful. You always do, my friend!
What kind of clear wax? Floor wax???