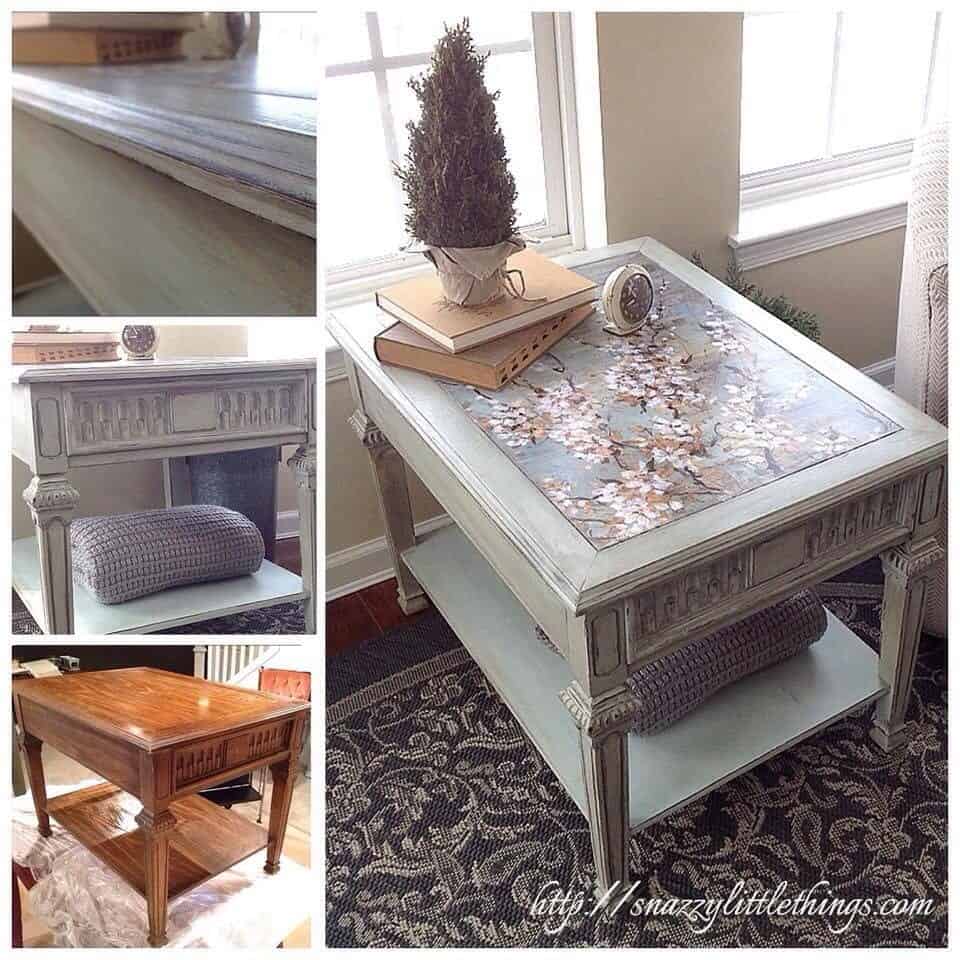
Upcycled Table with Decoupage
As you know, I LOVE transforming furniture with mixed media and decoupage.
So here is that plan:
Since I’ve done a similar tutorial before, (see my previous project) where I struggled with mod podge AND paint…please refer to that post for more details. This project was much smoother than the previous post.
Are you a modpodge expert? I’d love to hear from you…what tips and tricks have you learned in working with this medium?
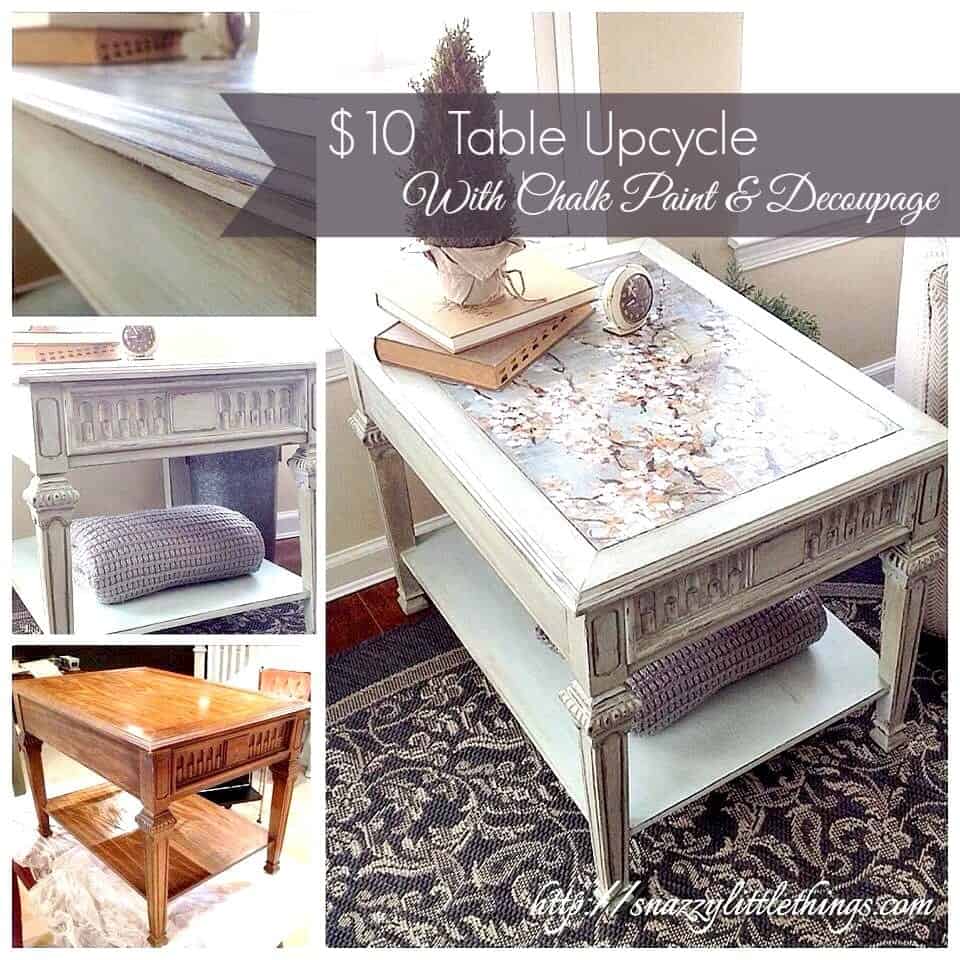
Here is a table, before. I found this from a former antique dealer who was liquidating their inventory:

And the best part? It was only $10. :)
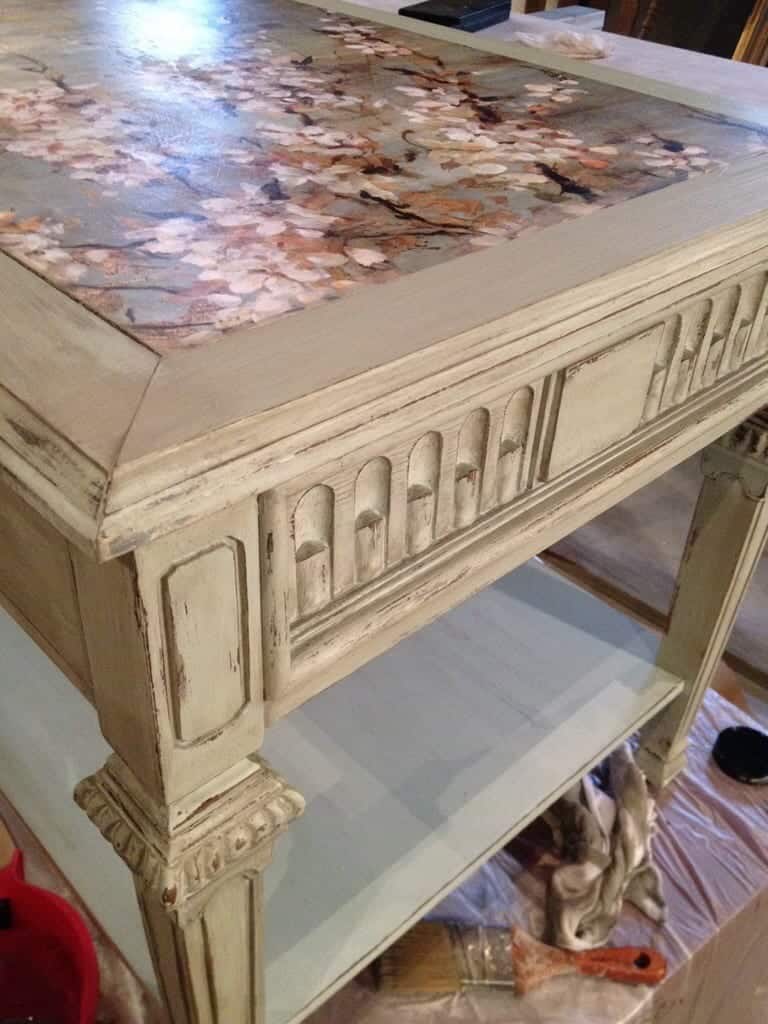
Applying a mixture of Annie Sloan Old White and Duck Egg Blue (I painted the underside too):
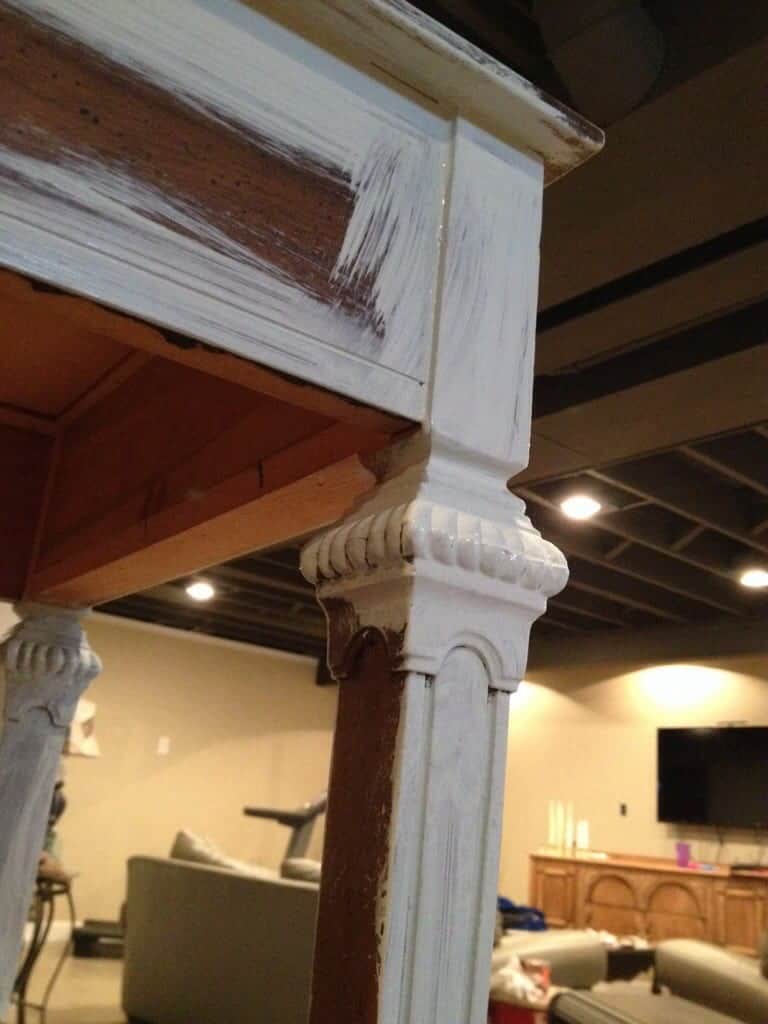
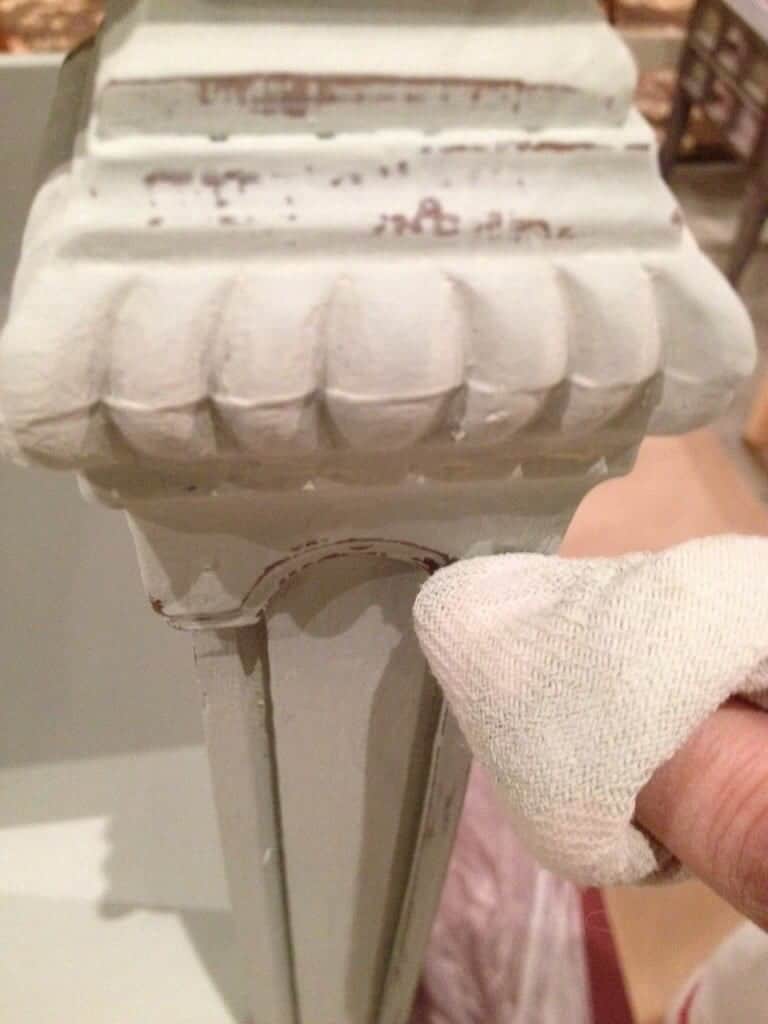
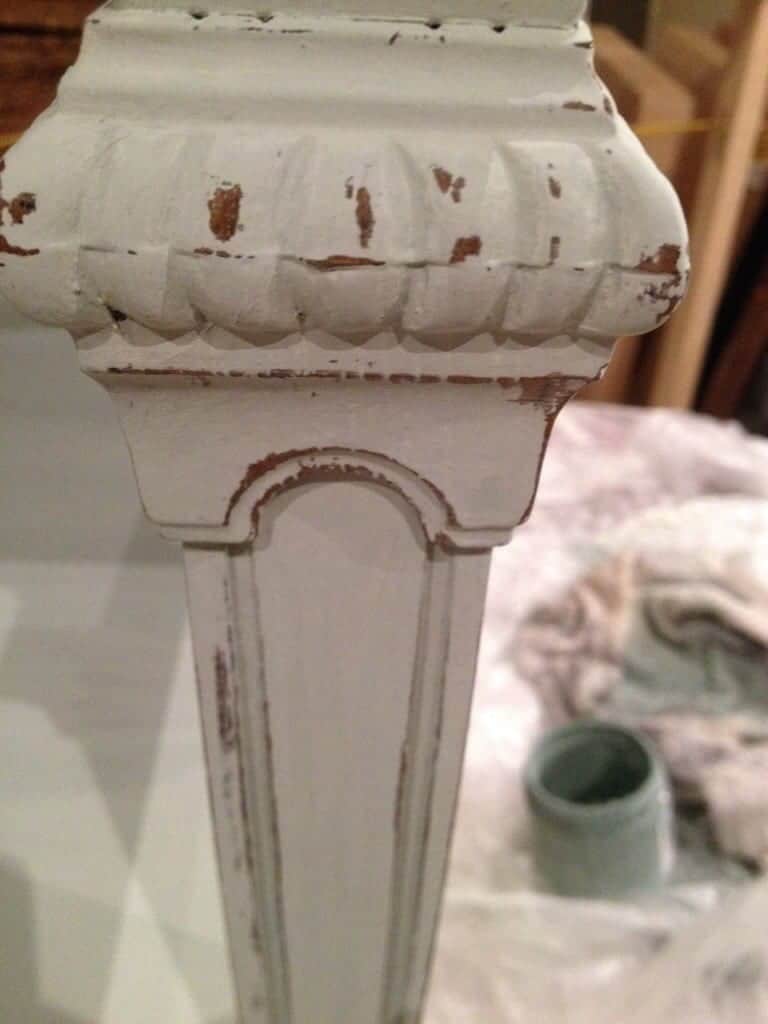
“Wet Distressing” means you take a wet cloth and distress the edges of the piece. A much cleaner way to distress as compared to sanding, less mess…especially for indoor projects. Believe me, you’ll thank me:
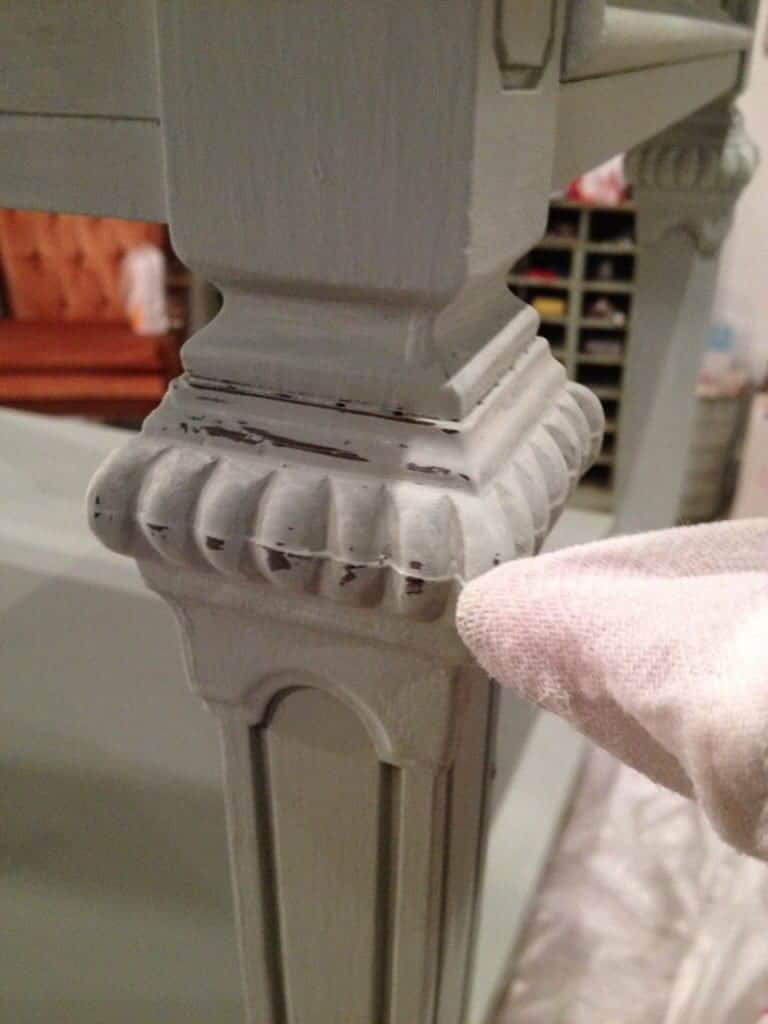
Carefully wet distressing edges to bring out and highlight the lines on this piece:
So I picked up some poster art from the craft store that I thought would look nice with the colors. Before I applied the image to the top I made sure I had some essential tools on hand. You have to work quickly with this medium. So I will share a few tips.
You need:
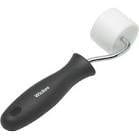
A wallpaper roller to smooth any wrinkles.
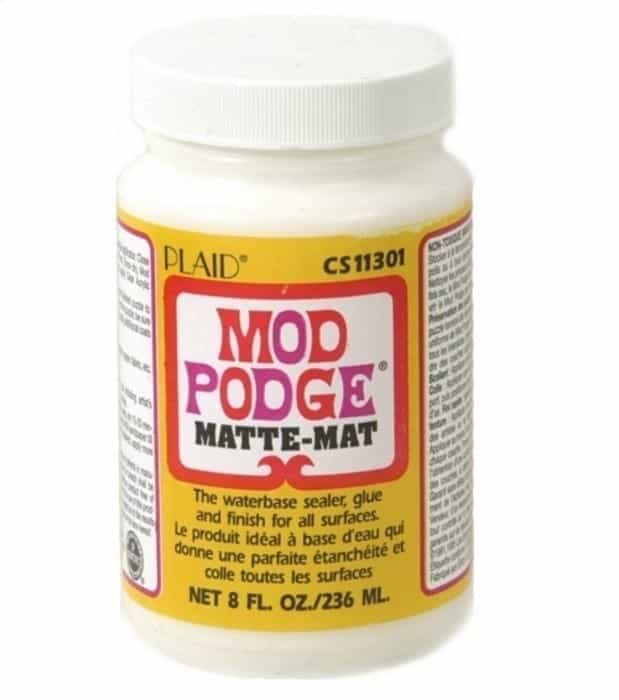
Mod Podge:
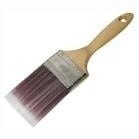
A brush that doesn’t shed fibers into the medium.
And once again, because I’ve done this type of project in a previous tutorial, I’ll just share pictures of the process.
I think this might be one of my favorite furniture flips yet.
After I applied the Old White / Duck Egg Blue combo….I watered down some French Linen and created a “wash”. Then highlighted clear and dark wax all over the painted areas.
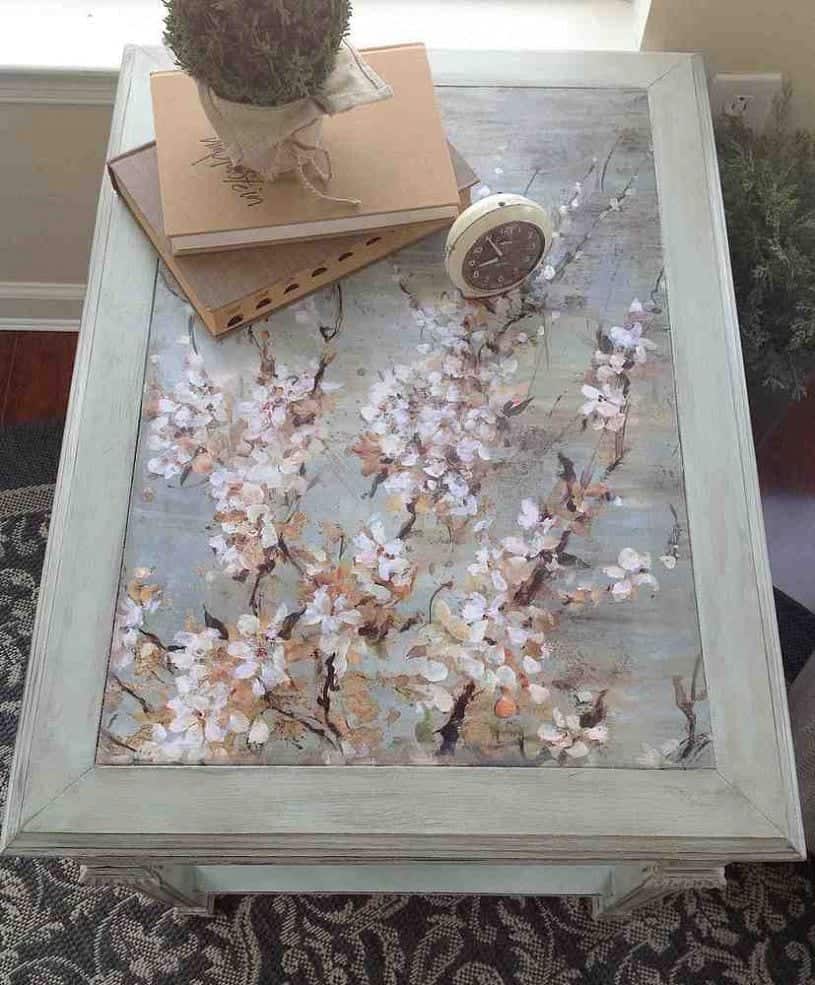
Here is the final result. And being stuck in the brutality of this midwestern winter…this table definitely makes me start thinking about SPRING!


Another beauty!! Love it!! :)
Nancy
Nancy…thanks. I really like the way it turned out…mod podge is still not easy but the results are so rewarding.
Love it! You’re an inspiration!
Thank you Suzanne!
LOVE it!! I love working with A.S. Chalk paint. So fun and inspiring!
Thanks so much Suzanne, I love it too!
Beautiful! I love the pattern of the art with the chalk paint. Just found you this morning through a pin of the gorgeous table you created with your first experience with Chalk Paint. I noticed that you bought your paint at Funky Junk Boutique and realized that we’re both Ohioans. :) I live in New Albany, a suburb of Columbus. Nice to “meet” you!
Small world! How nice of you to stop by and comment thank you for the kind words. I love that little store she’s coached me though many of my projects. I will check out your blog too!
So pretty! Sometimes I find decoupaged furniture to look a little tacky, but your table turned out so nice. I love wet distressing, too… so much nicer than dust everywhere!
Thanks Cynthia and I’m pretty picky about what type of images I’ll put on a piece. I want to be sure it’s a good match with the paint that I’m using, too. I appreciate you stopping by
Wow, this is awesome! Thank you for linking up with us at the #WWDParty and sharing this great DIY project. Have a wonderful weekend!
Absolutely gorgeous! Thank you for sharing… Did you apply the wash over the top too or, is it that you found the perfect poster art to match the colour mix?
Thank you, Mel!! Actually I did not apply any paint or wash on top of the art. To match up colors, I simply mixed the white/Duck Egg Blue for the rest of the wood to match the art perfectly. Thanks for stopping by! I hope this helps!
could you use polyurethane instead? I want to do a table that we eat on. I have an old calendar of 100 year old ads that I want to put on it.
It depends on the paper. If it’s old paper that feels like newspaper or sheet music then poly may work. But my paper was poster board and so a coat of poly wouldn’t cut it. Do you have similar paper where you could experiment on a sample board first?
This is absolutely gorgeous and if I saw only the finished result without a description I wouldn’t have believed it was only $10!! That is incredible and inspiring- makes me want to get back to restoring second-hand store furniture!
Midwestern winter- oh I know all about those ;) I be a Minnesotan!
Jeannette,
I’m just learning about chalk paint and mod podge and have a question, or maybe a few questions. I’ve been doing my homework but still am not sure about these:
1) did/could/should you first chalk paint the surface where the paper/mp is going? Or put it straight on the existing surface? If so, did you sand the existing surface first? Maybe that depends on the condition of that surface.
2) the chalk paint begs a wax on top to finish. Is this useful on top of the paper surface? If it were thin paper, like 50 or 60#, like wrapping paper, etc., and if the piece would get moderate to heavy traffic/use.
3) or is it better to paint a poly finish on the papered surface or something like that?
I hope these make sense and i’ll keep doing my homework before diving in. I love this piece you shared. So pretty.
Thanks Debbie. Chalk paint worked just fine. My projects evolve as I paint…I don’t often have a plan. So the chalky base gave the poster a place to stick. In this case it worked just fine. If a surface is slick at all, I would say provide it with some base (even chalk paint) so it sticks — but Mod Podge is super-adhesive so it would most likely stick to almost any surface.I used posters for my pieces. The top layer can easily tear off if the mod podge becomes tacky. So when I add layers (and many layers, mind you) I make sure it never becomes sticky and spray water to prevent the stickiness. I think in the end…I used a combination of many, many layers of mod podge. Poly would probably be ok too, but I would also say be sure you are careful to work fast and now allow the medium to become sticky so you don’t tear your image off inadvertently.
I this while looking for inspiration for a project.
What a fabulous transformation – it is simply beautiful now.
Hi, what a beautiful project!
So, I’m still very new to the craft world of chalk paint, decoupage, waxing, varnishing etc. If you don’t mind, may I ask a question or 2 please?
When you chalk paint a piece and then decoupage, do you wax/varnish after the decoupage and over it or do you do the decoupage over the finish? Any tips will be welcome. I’m in SA so products may differ a bit but I’m fairly certain I can come up with something very similar.
Thanks allot (-:
Did you apply the dark wax before or after you applied the poster? Looking to something similar and was concerned the mod podge would not adhere after the antique wax was applied